

Testing and Measuring Inductors ~ Inductors play a vital role in modern electronics by storing energy in a magnetic field when electric current flows through them. Whether you’re designing a circuit, troubleshooting, or repairing electronics, understanding how to test and measure inductors is crucial. This guide provides a comprehensive overview of inductor testing methods, essential tools, practical examples, and best practices to ensure accurate measurements and reliable diagnostics.
1. What Is an Inductor?
An inductor is a passive two-terminal electronic component that stores energy in a magnetic field when electrical current flows through it. It typically consists of a wire coil wound around a core (air, ferrite, or iron). Inductors are used in various applications such as filters, transformers, energy storage systems, and signal processing.
Key Parameters of Inductors:
- Inductance (L): Measured in henries (H)
- DC Resistance (DCR): The resistance of the wire used in the coil
- Q-Factor (Quality Factor): A measure of an inductor’s efficiency
- Self-Resonant Frequency (SRF): Frequency at which an inductor ceases to behave like an inductor
2. Why Testing and Measuring Inductors Is Important
Testing inductors ensures they function properly in your circuits. Faulty or degraded inductors can cause power losses, unstable filtering, or complete circuit failure. Measurement also helps verify specifications for new components or during prototyping.
Common Reasons to Test Inductors:
- Component verification during manufacturing
- Diagnosing faulty circuits
- Quality assurance and performance tuning
- Educational and training purposes
3. Tools for Testing and Measuring Inductors
There are several instruments available for testing and measuring inductors. The most commonly used are:
a. LCR Meter (Inductance, Capacitance, Resistance Meter)
This is the most accurate tool for measuring inductance and associated parameters like DCR and Q-factor. It applies an AC signal and calculates inductance based on voltage and current response.
- Pros: High accuracy, wide frequency range
- Cons: Expensive for high-end models
b. Digital Multimeter (DMM)
Basic multimeters can measure resistance (DCR), and some advanced models offer inductance measurement.
- Pros: Affordable, easy to use
- Cons: Limited precision, can’t measure Q-factor
c. Oscilloscope with Function Generator
You can measure inductance indirectly by creating an LC or RL circuit, applying a known frequency, and calculating values using waveform analysis.
- Pros: Useful for complex diagnostics
- Cons: Requires calculations, less straightforward
d. RLC Bridge
Similar to an LCR meter, an RLC bridge is used in lab settings for high-precision measurement of passive components.
e. Arduino or Microcontroller-Based Testers
DIY inductor testers using microcontrollers can offer decent measurements for hobbyists and educational use.
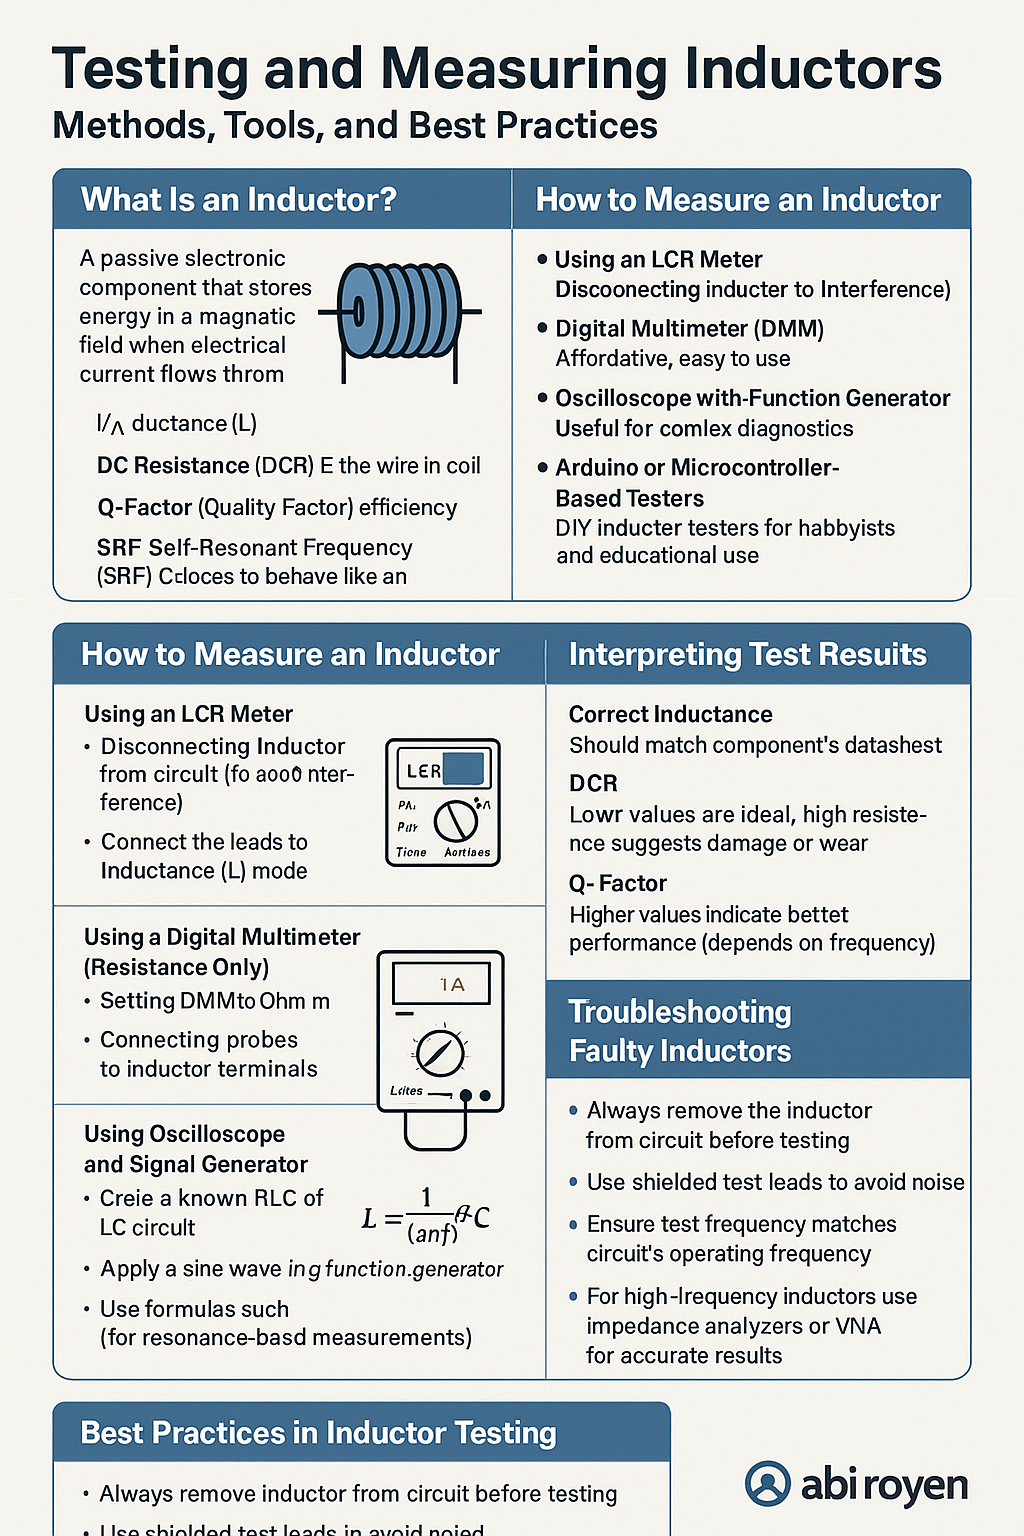
4. How to Measure an Inductor
a. Testing and Measuring Inductors Using an LCR Meter
- Disconnect the inductor from the circuit (to avoid interference).
- Connect the leads to the LCR meter.
- Set the meter to inductance (L) mode.
- Select the frequency (usually 1kHz is a good starting point).
- Read the inductance value on the display.
b. Testing and Measuring Inductors Using a Digital Multimeter (Resistance Only)
- Set the DMM to Ohm mode.
- Connect the probes to the inductor terminals.
- Check the resistance (DCR) and compare it to the datasheet.
Note: A very high or infinite resistance may indicate an open coil, while a short may indicate damage or improper winding.
c. Using an Oscilloscope and Signal Generator
- Create a known RLC or LC circuit.
- Apply a sine wave using a function generator.
- Observe the voltage and current waveforms.
- Use formulas such as: L=1(2πf)2CL = \frac{1}{(2\pi f)^2 C}L=(2πf)2C1 (for resonance-based measurements)
d. Using DIY Arduino-Based Tester
- Build or obtain an inductor testing circuit using an Arduino and LCD display.
- Program it to apply pulse signals and calculate inductance from timing characteristics.
- Display the value for reference.

5. Interpreting Test Results
Understanding the results is as important as the measurement itself.
- Correct Inductance: Should match the component’s datasheet (± tolerance)
- DCR: Lower values are ideal; high resistance suggests damage or wear
- Q-Factor: Higher values indicate better performance (depends on frequency)
- Physical Inspection: Check for corrosion, broken leads, or burned coils
6. Troubleshooting Faulty Inductors
Here are signs and symptoms of a bad inductor:
| Symptom | Possible Cause |
|---|---|
| No inductance reading | Open circuit / broken wire |
| Very low inductance | Shorted turns |
| Overheating | High current / low Q-factor |
| Buzzing sound in circuit | Mechanical looseness / saturation |
| Inconsistent readings | Interference or aging |
Replace or re-wind faulty inductors as needed. Ensure they are correctly rated for your application.
7. Best Practices in Testing and Measuring Inductors
- Always remove the inductor from the circuit before testing.
- Use shielded test leads to avoid noise.
- Ensure your test frequency matches your circuit’s operating frequency.
- For high-frequency inductors, use impedance analyzers or VNA for accurate results.
- Store inductors in anti-static and moisture-proof containers when not in use.
8. Safety Considerations
- Never test inductors in a live circuit.
- Beware of high voltages in switching power supplies or audio systems.
- Use insulated tools and wear ESD protection when handling sensitive components.
Conclusion of Testing and Measuring Inductors
Testing and measuring inductors is a fundamental skill in electronics development and repair. Whether you’re an engineer, technician, or enthusiast, having the right tools and knowledge can save time and prevent costly errors. Use LCR meters for precise work, multimeters for quick checks, and oscilloscopes for advanced analysis. By mastering inductor diagnostics, you’ll ensure your circuits perform reliably and efficiently.
Published by: Abi Royen
For more articles on electronics components, visit our blog.