
Potentiometers, often called variable resistors, are essential components in electronics, used to adjust voltage levels, control audio volume, tune circuits, and more. Over time, these components can wear out or malfunction, leading to inconsistent performance. Knowing how to test a potentiometer is an essential skill for electronics hobbyists, technicians, and engineers.
In this guide, we’ll explore what a potentiometer is, the tools you need, and the step-by-step method to test it accurately using a multimeter.
What is a Potentiometer?
A potentiometer is a three-terminal resistor with a sliding or rotating contact (called the wiper) that forms an adjustable voltage divider. By moving the wiper, you change the resistance between the terminals, controlling the amount of electrical current flowing through a circuit.
Basic Structure
- Terminal 1 (Input) – One end of the resistive track.
- Terminal 2 (Wiper) – The movable contact that slides across the resistive element.
- Terminal 3 (Output) – The other end of the resistive track.
Potentiometers are widely used in:
- Audio devices (volume control knobs)
- Lighting dimmers
- Measurement instruments
- Tuning circuits
Why Test a Potentiometer?
Testing a potentiometer helps identify:
- Faulty resistance values
- Dead spots (areas where resistance jumps or drops suddenly)
- Open circuits
- Worn-out tracks due to usage
Common signs your potentiometer may need testing:
- Crackling or static noises in audio equipment
- Inconsistent brightness or volume levels
- Control knobs not responding smoothly
Tools Needed to Test a Potentiometer
Before starting, gather the following:
- Digital Multimeter (DMM) – Preferably one with an ohmmeter function.
- Potentiometer Datasheet – To know the rated resistance value.
- Screwdriver – If you need to remove the potentiometer from a device.
- Alligator Clips – For a more stable connection.
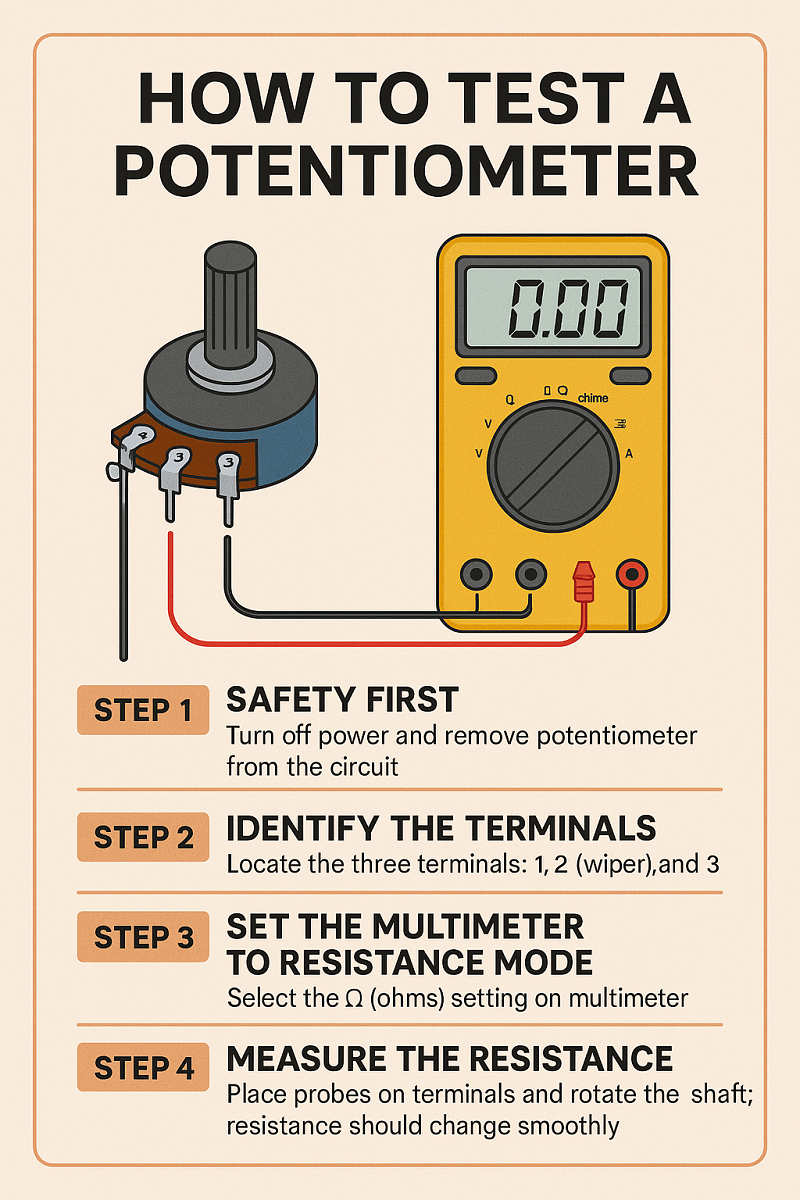
Step-by-Step Guide: How to Test a Potentiometer with a Multimeter
Step 1: Safety First
- If the potentiometer is still in a device, turn off the power and unplug it.
- For accurate results, remove the potentiometer from the circuit to avoid interference.
Step 2: Identify the Terminals
- Locate three terminals on the potentiometer.
- Terminal 1 and 3 are at the ends of the resistive track.
- Terminal 2 (middle pin) is connected to the wiper.
Step 3: Set the Multimeter to Resistance Mode
- Turn the dial on your multimeter to the Ω (ohms) setting.
- If your multimeter is manual-ranging, choose a range slightly above the potentiometer’s maximum resistance.
Step 4: Measure the Total Resistance
- Place one probe on Terminal 1 and the other on Terminal 3.
- The reading should be close to the potentiometer’s rated value (e.g., 10 kΩ).
- If the reading is infinite (OL) or far from the expected value, the potentiometer may be defective.
Step 5: Test the Wiper Function
- Connect one probe to Terminal 1 and the other to Terminal 2 (wiper).
- Slowly rotate the potentiometer shaft while watching the multimeter reading.
- The resistance should change smoothly from near zero to the maximum value.
- Repeat the test with the probe on Terminal 3 and Terminal 2.
Step 6: Check for Dead Spots
- If the resistance jumps abruptly, drops to zero, or spikes, it indicates worn or damaged spots on the resistive track.
Step 7: Reinstall or Replace
- If the potentiometer passes all tests, reinstall it.
- If it fails, replace it with one of the same resistance rating and taper type (linear or logarithmic).
Tips for Accurate Test a Potentiometer
- Clean dirty contacts: Sometimes, a noisy potentiometer is caused by dust or oxidation. Use contact cleaner before replacing.
- Avoid excessive force: Turning the shaft too hard can damage the wiper.
- Use the correct multimeter range: Setting it too low or too high can cause inaccurate readings.
- Check taper type: Audio applications usually use logarithmic tapers, while others use linear.
Common Potentiometer Issues
| Issue | Possible Cause | Solution |
|---|---|---|
| No resistance reading | Broken resistive track | Replace potentiometer |
| Sudden jumps in resistance | Dirty or worn wiper | Clean or replace |
| Crackling noise in audio | Dust/oxidation | Use contact cleaner |
| Resistance stuck at one value | Damaged wiper | Replace component |
Applications of Potentiometer Testing
Knowing how to test a potentiometer is useful for:
- Repairing audio equipment
- Calibrating control systems
- Maintaining industrial machinery
- Troubleshooting robotics and automation
Conclusion Test a Potentiometer
Testing a potentiometer is a straightforward process that requires only a multimeter and basic knowledge of how the component works. By checking the total resistance, wiper function, and smooth variation, you can quickly determine whether the potentiometer is still functional or needs replacement.
Regular testing helps prevent failures, improve performance, and extend the life of your electronic devices. Whether you’re a hobbyist or a professional technician, mastering this skill will save time and money in the long run.